Posts

Center Fuselage - Rear

Image
The rear part of the center fuselage is now largely complete: Some holes are missing however, will have to drill those out:

Undercarriage kit

Image
Due to forecast price increases, I ordered my next kit early, which contains the landing gear components  and it came in recently!

Begin static system

Image
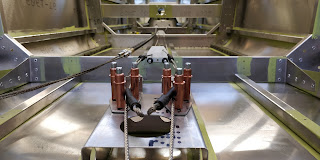
Ordered the static port and tubing kit from cleaveland tools, and installed the ports as per the instructions. The holes are not as perfect as I would like them to be, but the esthetics can be fixed at time of painting at least. I used some red RTV which seems to really create a good bond!

Rudder cable and top rear skins

Image
I ran the rudder cables, as per the instruction, fairly straight forward: I also spent some time looking at top skin installation. Turns out there are no instructions on those either, only in this case, it can get a little convoluted. First I had to figure out how the top longeron fits. Turns out there's a support angle, as this is where the COM antenna goes! This is discussed in the electrics manual ... you really have to read ahead to catch this! I do NOT plan to have a parachute. But although they say the parachute is optional, the skin is designed for it. I obviously don't want the parachute box, as one reason I don't want it, is I want my cargo space! Will have to enquire about that one.

Rear fuselage skinning

Image
I have been working on the rear fuselage skins! One the one side, there's a hole missing in the skin to match the longeron: As it turns out, that rivet gets in the way of the forward skin that goes on top: So I had to indent the skin a little bit to make room for that rivet (on both sides).   Also discovered that the ribs can sometimes push the skin out, and create a "bulge" in the skin. You can fix this by bending or filing down the offending parts of the ribs, and hammering the skin a little bit. Finally, I proceeded to the forward skins: Don't forget to leave a few unriveted holes for the steps! The installation of the steps is entirely undocumented, but it appears they fit one rivet back from the joint to the center fuselage. Due to a known manufacturing defect, some holes were misaligned, and I create a doubler for added strength:

Rear fuselage progress!

Image
I've been quiet, but working! First of all, finally got my bottom rear skin from the factory, after MONTHS of waiting! Everything fit!!! I cried tears of joy ... Since I had prepped so many parts in advance, I quickly put it all together: That went pretty well. Then onto skinning:

Luggage close off

Image
You close off the tail from the luggage area with a piece that attaches to the rib, like this: Turns out there are 6 holes that are lined up with rivet heads under them, but the holes are too small: So, I enlarged them, easy peasy: